
Testing Google Picker/Drive on Localhost and... Cider?!

Today I decided to write a quick post about user the Google Picker API on a local machine. Having encountered this issue myself while developing, the solution is not particularly intuitive unless you have edited your computer's host file before.
So, first, let us define the problem. I want to use the Google Picker API, and possibly the Google Drive API to access a user's files and do something with the information. Maybe I want to download a file the user chooses to the server. The problem is, when you are working on your application on your local machine, Google does not recognize localhost as a valid origin for their OAuth APIs. While some people give up at this juncture, there is a simple way around it. Lets decide to call our dev site dev.mysite.com. In order for our address to point at localhost, we need to edit our host file.
What is a host file? Simply put, a host file is a plain text file used to map hostname (such as dev.mysite.com) to an IP Address. In fact, host files were how hostnames were resolved before DNS (Domain Name Servers) existed. By editing your host file, you are telling your computer to use a friendly host name to go to a (less friendly) IP Address. On most machines, there is already a line in the host file stating localhost maps to 127.0.0.1. We simply need to add an entry mapping our new hostname, dev.mysite.com, to 127.0.0.1 as well. While my post is not intended as a primer on how to edit host files, if you need more information and details on how to do this, check out a handy guide from RackSpace, which includes instructions for almost all systems.
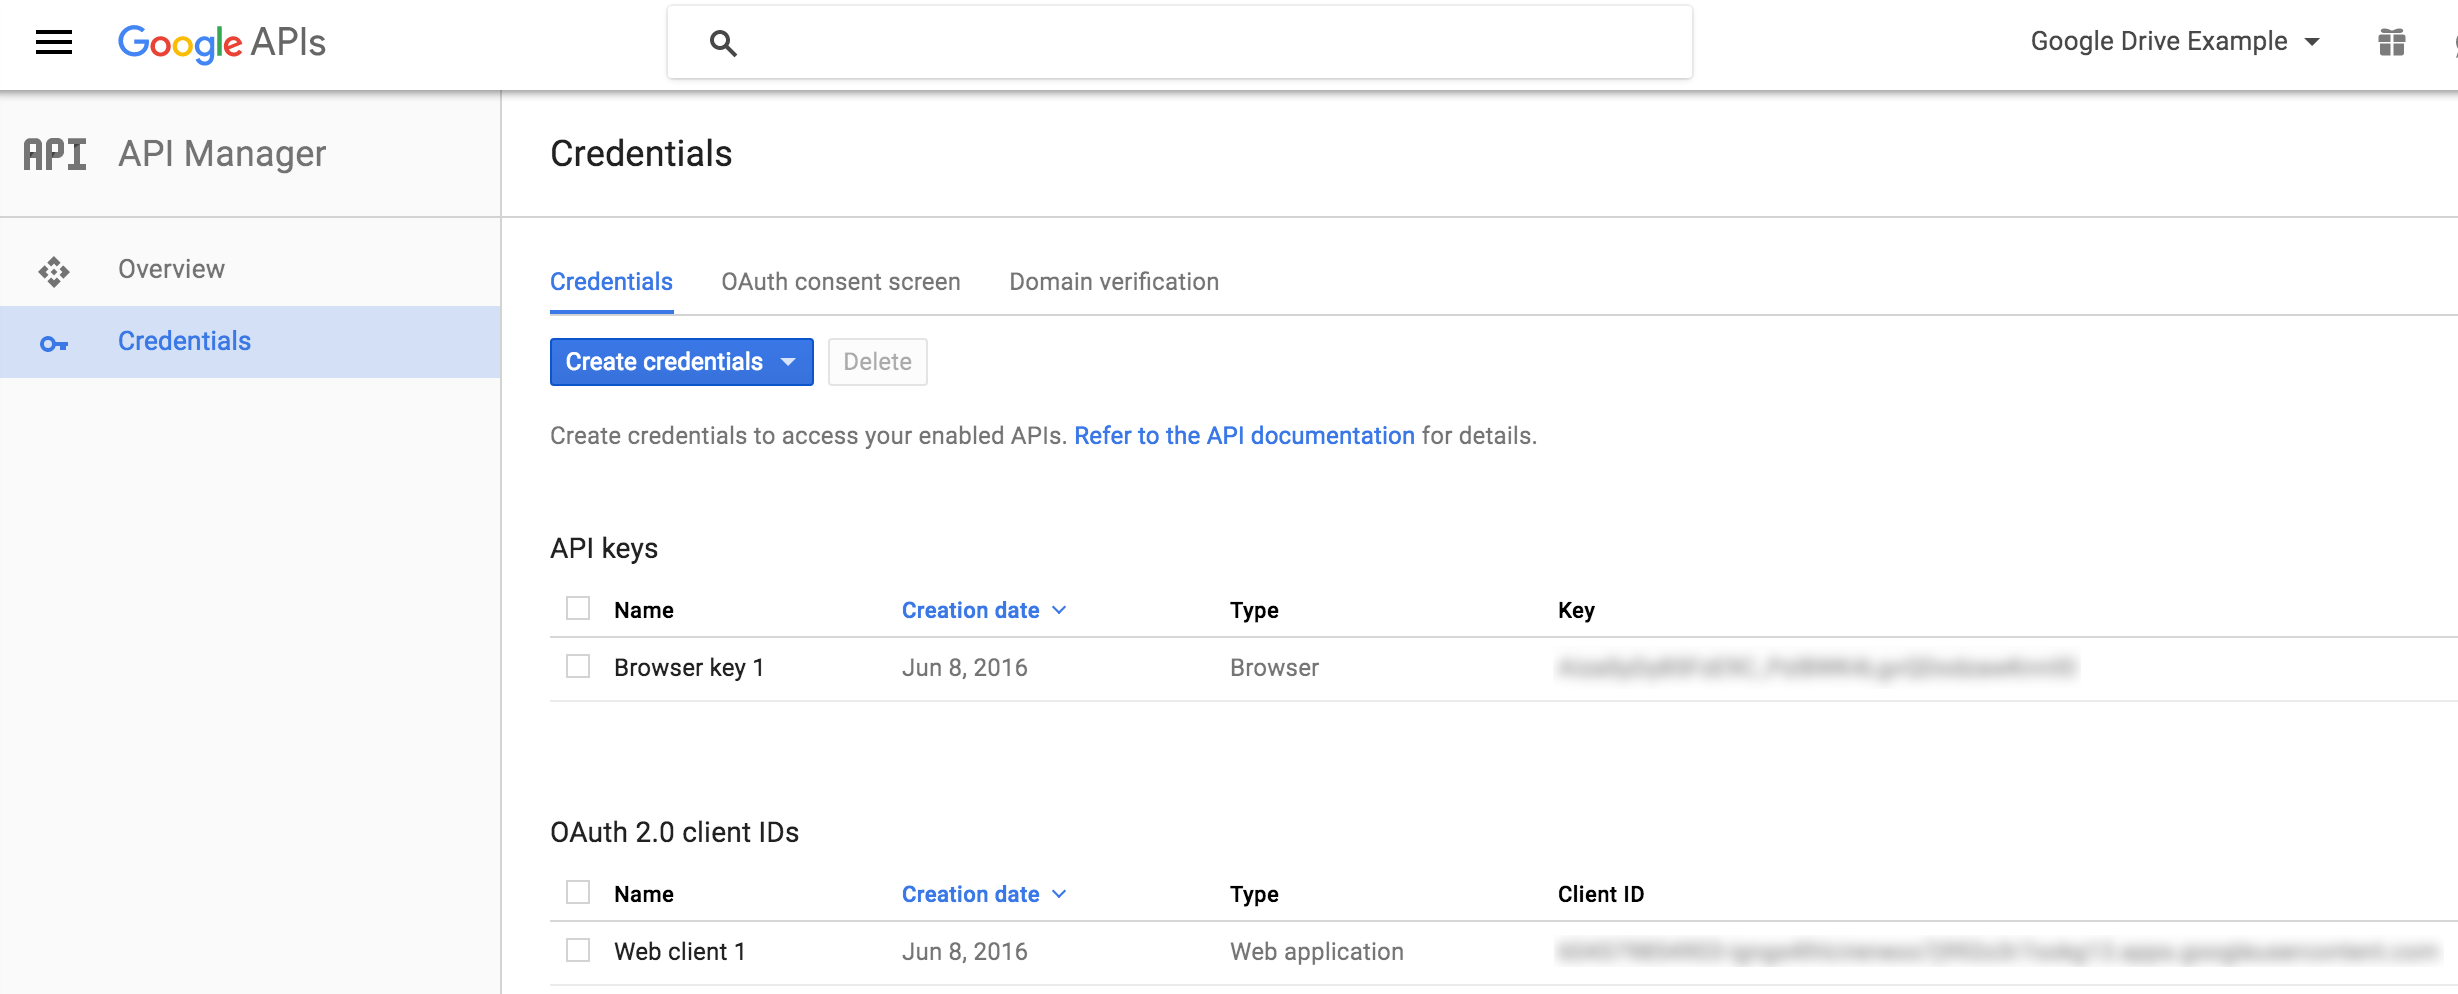
Once you have added your hostname to your hostfile, you must also add it to your Google Application in the Google Developer's Console. In the case of my personal application, I use an API key as well as client credentials for OAuth, in order to facilitate the user accessing their information through my application. If I log into My Google Developer Console (a test one in this case) I see my credentials:
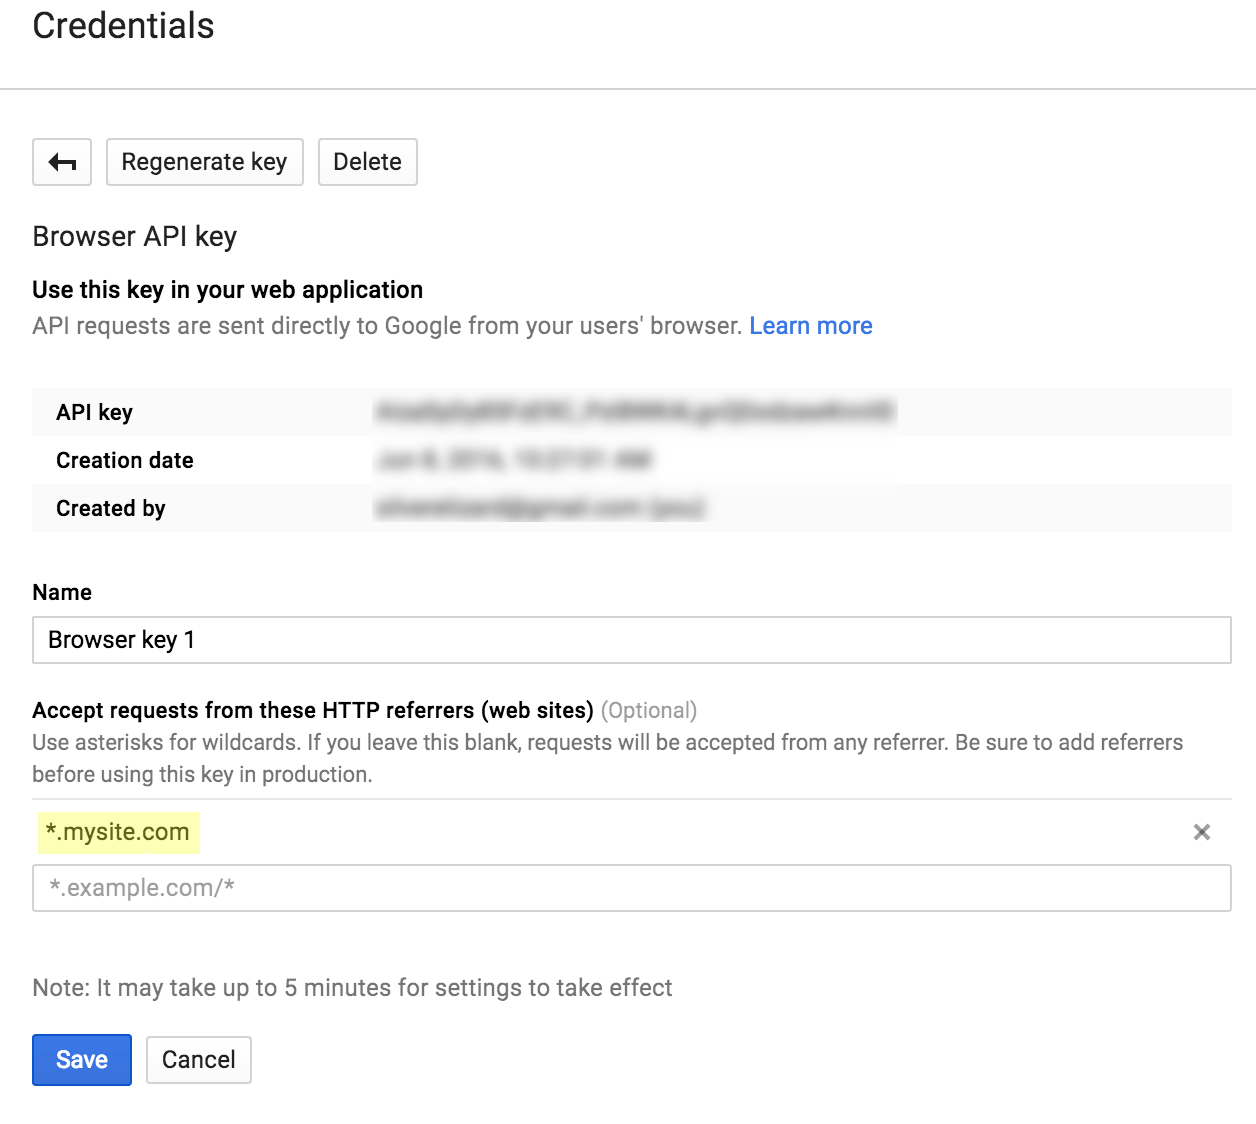
In my case, I need to update both my browser key and my OAuth credentials. When you click on the Browser Key name, you will see the Accept requests from these HTTP referrers (web sites) section. Add your wildcard hostname here: *.mysite.com:
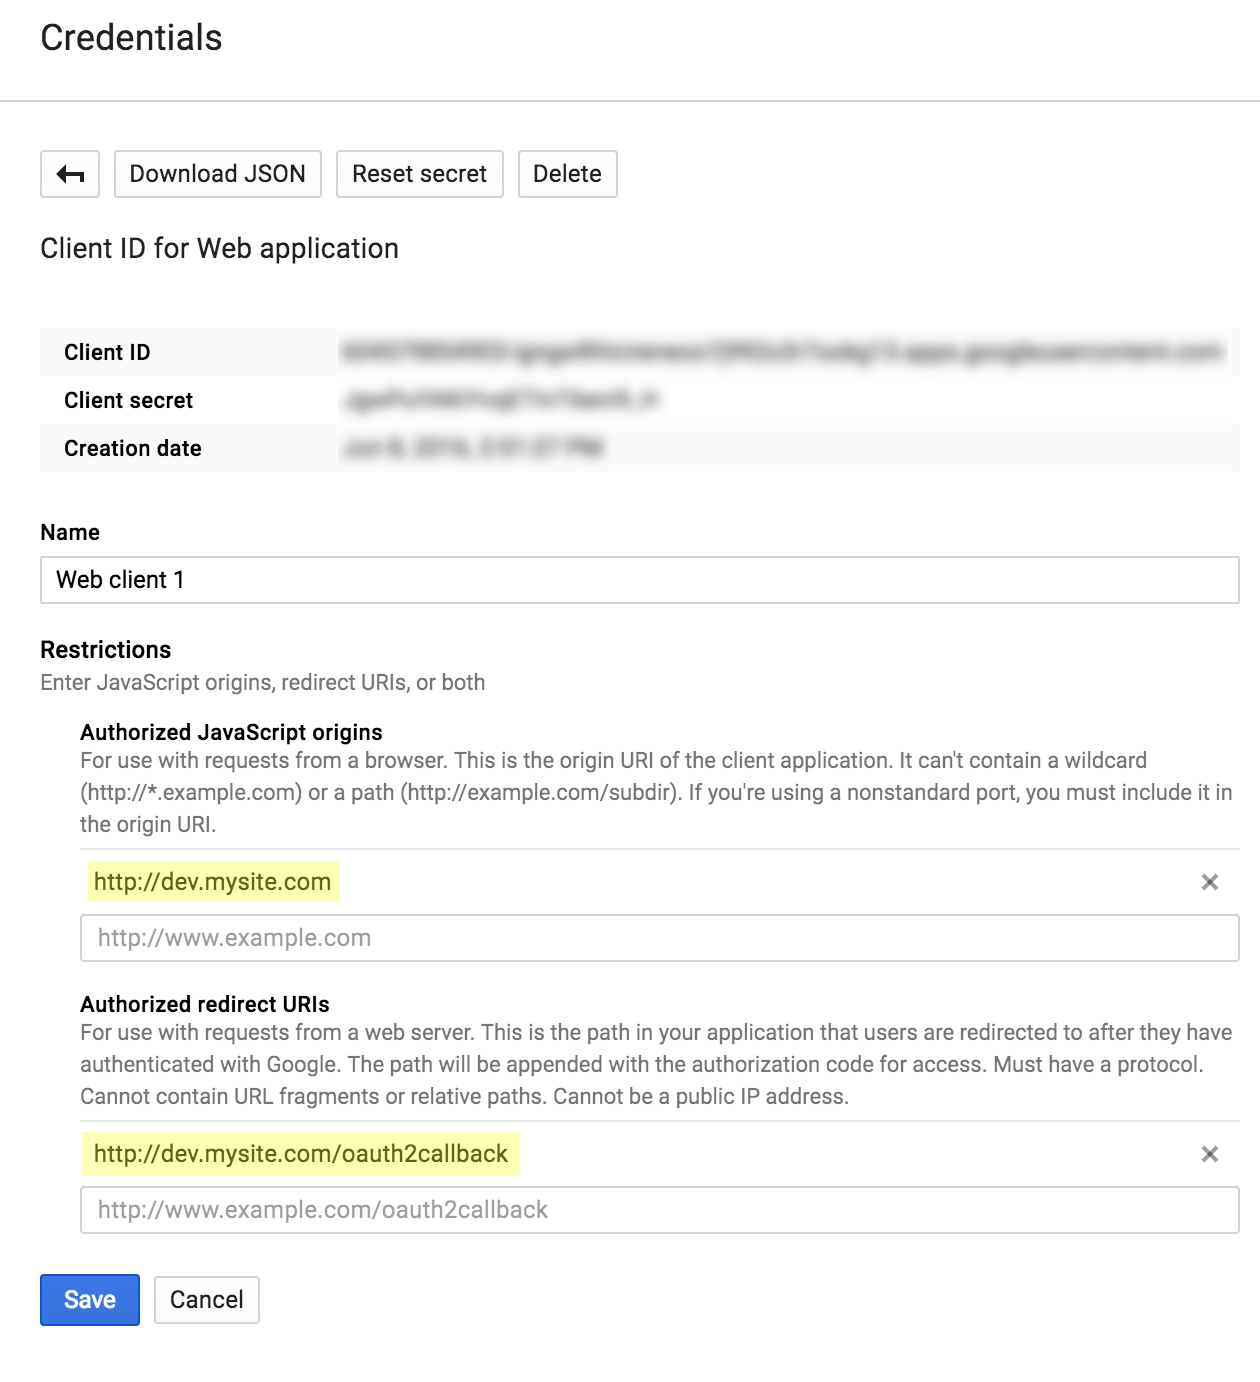
Next, I need to add the exact host, including http (or https, if you are using ssl on your local machine). Selecting the Web Client from the same list we selected the Browser key takes us to the settings for OAuth credentials. You will see two important sections: Authorized JavaScript origins and Authorized redirect URIs. You only need to add something to the second sections if you plan on calling the API from the server and need a callback for Authentication. I have added my hostname to both for good measure:
After making all the necessary changes and saving them, we are ready to use our Google Picker and/or Drive implementation on our local machine! The only thing left to is start our server (however you do this) and make the site available on port 80. Doing this usually requires sudo or root level access, since port 80 is reserved. The reason for serving on port 80 is simply Google's APIs do not play well with ports in origins. You must use port 80 for the APIs to function on localhost.
Now, with our hostfile edits and serving the site from port 80, you should be able to visit dev.mysite.com in your browser of choice and see your local development on localhost. Hope this helps save hours of annoyance!
Of course, no post would be complete without a shout out to some fabulous brew I have tried lately. I am going to branch out and mention something non-beer for once! We have a cider house in Atlanta called Treehorn Cider, and their cider is really, really good. Their signature dry cider is a perfect drink, not overly sweet, with a nice tart tang at the end reminiscent of Granny Smith apples. Hope to see lots more from them!
